
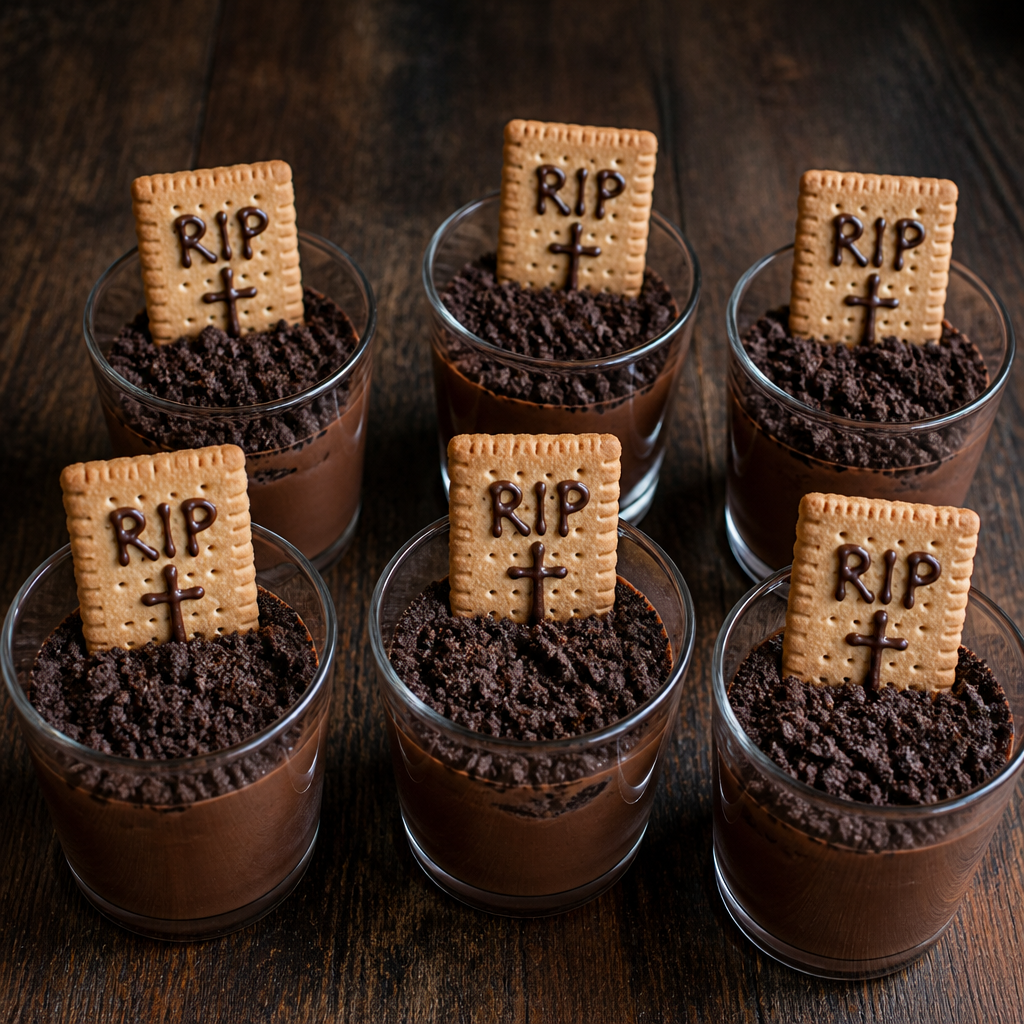
Halloween Chocolate Graveyard Dessert Cups
shared by Nibblore Kitchen
These individual graveyard cups layer silky cooked chocolate pudding with dark chocolate-cookie crumb “soil” and crisp biscuit tombstones. Cornstarch thickens the pudding reliably, while a brief boil removes any starchy taste; thorough chilling gives it enough structure to support the decorations. Prepare the pudding a day ahead, then add the graves shortly before serving for the best texture. • Whisk continuously once the pudding starts steaming; cornstarch thickens abruptly and can scorch on the bottom if left unstirred. • Use cups with an opening at least 7 cm wide so the biscuit tombstones fit without breaking. • Add the crumb soil and biscuits close to serving time, because refrigerator moisture gradually softens both decorations. • If the pudding looks slightly lumpy before the chocolate is added, press it through a fine-mesh sieve while still hot, then continue as directed. • Use semisweet chocolate in place of dark chocolate for a sweeter, milder pudding and decoration. • Replace the chocolate sandwich cookies with the same weight of crisp chocolate wafer cookies; mix the crumbs with 20 g melted butter if they seem too dry to resemble soil. • Use six plain oval or finger-shaped biscuits of similar size if rectangular tea biscuits are unavailable. • For a less rich pudding, replace the heavy cream with an equal amount of additional whole milk; the finished texture will be slightly lighter. Refrigerate the pudding cups tightly covered for up to 3 days. For the crispest decorations, store the cookie crumbs and decorated biscuits separately in airtight containers at cool room temperature and assemble shortly before serving. Fully assembled cups can be refrigerated for up to 8 hours, although the biscuits will soften. Freezing is not recommended because the cornstarch-thickened pudding may separate when thawed; serve cold without reheating.
- Total time
- 45 min
- Servings
- 6
- Difficulty
- Intermediate
Create a free account to keep this recipe in your own cookbook and find it again when it’s time to cook.
Save to my cookbook — freeIngredients
- 120 ggranulated sugar
- 35 gunsweetened cocoa powder
- 30 gcornstarch
- ¼ tspfine salt
- 600 mlwhole milk, divided
- 120 mlheavy cream
- 100 gdark chocolate, finely chopped
- 1 tspvanilla extract
- 180 gchocolate sandwich cookies, about 16 cookies
- 6plain rectangular tea biscuits, each about 6 x 4 cm
- 30 gdark chocolate, finely chopped for decorating
- ½ tspneutral vegetable oil, for decorating
Instructions
- 1Set out six clear, straight-sided cups with a capacity of 250–300 ml each on a small rimmed tray. Make room in the refrigerator for the tray.
- 2Whisk the sugar, cocoa powder, cornstarch and salt in a 2-quart (about 2-liter) heavy-bottomed saucepan until no pale lumps remain. Gradually whisk in 120 ml of the milk to form a smooth paste, then whisk in the remaining 480 ml milk and the cream.
- 3Place the saucepan over medium heat and cook for 6–8 minutes, whisking steadily and scraping the bottom and corners, until the pudding begins to release large bubbles and visibly thickens. Once it reaches a full gentle boil, reduce the heat to medium-low and cook for exactly 1 minute, whisking continuously; the pudding should coat the whisk heavily and briefly hold a trail across the surface.
- 4Remove the pan from the heat. Immediately add the 100 g chopped dark chocolate and let it stand for 30 seconds, then whisk until completely melted and glossy. Whisk in the vanilla.
- 5Divide the hot pudding evenly among the six cups, about 150 ml or 160–170 g per cup. Tap the tray gently to level the surfaces. Press a small piece of plastic wrap directly against each pudding surface to prevent a skin, then cool at room temperature for 25 minutes.
- 6Refrigerate the covered cups until cold and firmly set, at least 4 hours or up to 24 hours. The centers should no longer ripple when the tray is moved. This cooling and chilling time is additional to the listed active preparation and cooking times.
- 7While the pudding chills, pulse the chocolate sandwich cookies in a food processor for 20–30 seconds until they resemble coarse soil. Alternatively, seal them in a sturdy bag and crush them with a rolling pin. Store the crumbs airtight at room temperature until assembly.
- 8For the tombstone writing, put the 30 g dark chocolate and vegetable oil in a small microwave-safe bowl. Microwave at 50% power in 15-second bursts, stirring after each, until smooth, about 45–60 seconds total. Cool for 3 minutes, then transfer to a small piping bag or parchment cone and snip a hole about 1 mm wide.
- 9Pipe a small cross, “RIP,” or simple short lines onto the upper half of each plain biscuit, using about 5 g chocolate per biscuit. Leave the lower 2 cm undecorated so it can be inserted into the pudding. Let the chocolate set at cool room temperature for 15 minutes, or refrigerate the biscuits for 5 minutes.
- 10No more than 30 minutes before serving, remove the plastic wrap and scatter 30 g cookie crumbs evenly over each cup. Insert one decorated biscuit about 2 cm into the back half of each cup, keeping it upright. Serve chilled. Total elapsed time is about 5 hours 25 minutes, including 25 minutes of cooling, at least 4 hours of chilling and 15 minutes for the piped decorations to set.